 This was another fun card to make and it all started with the background paper and the same stencil from the first card. Yes, it is the same stencil which I re-positioned multiple times.
 I used two Close to My Heart inks one was Flaxen and the other one Glacier. The first stencil was colored with Glacier (blue) starting in the upper left corner really dark and getting lighter to the lower left corner. Next, the stencil was moved one over to the right, to go between the blue diamond shapes. Now I used the Flaxen (green) ink and applied it the same way; dark to light, left to right.
Now I moved the stencil one down matching it between the two green diamonds. This time I started dark in the lower right corner and when up lighter towards the upper left corner. One more time moving the stencil one step to the left and between the diamonds and repeat with the blue color.
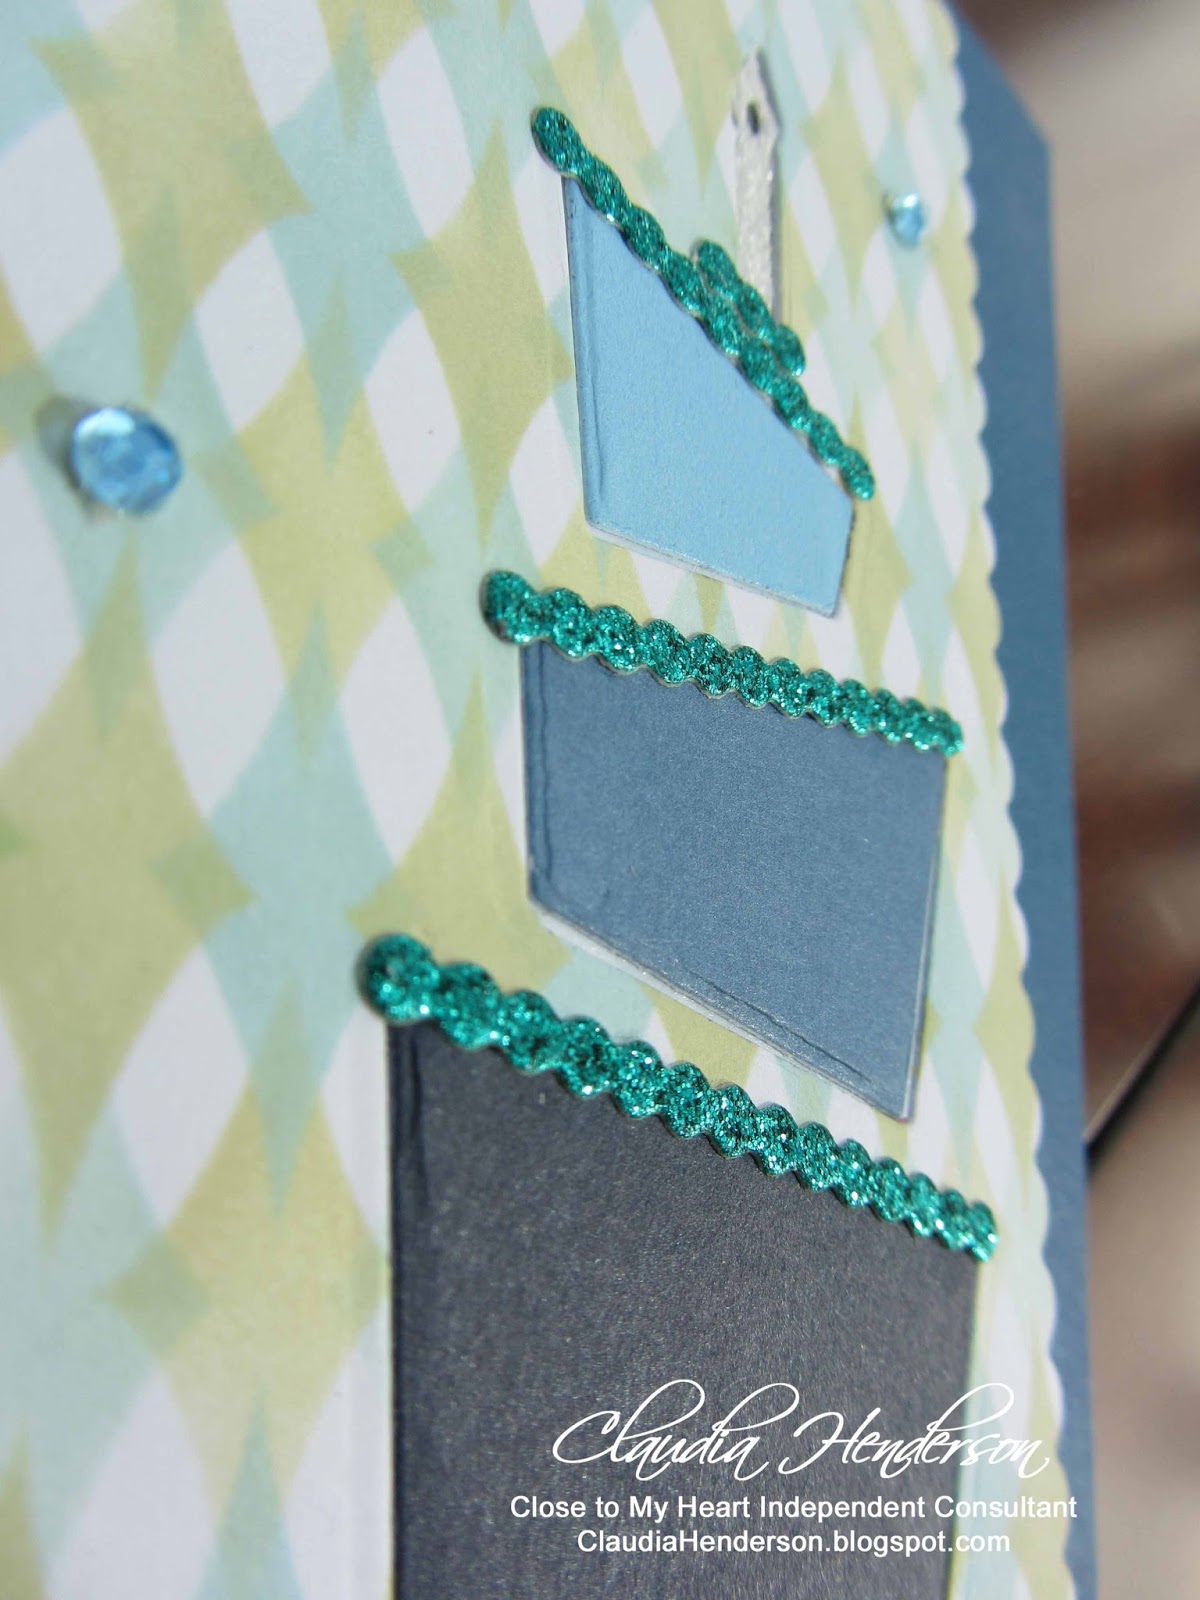

 This creates this awesome 3d look. I used my scalloped rectangle die and cut out the base for my wacky cake. Same method was used like previous explained. Place the cake dies on the paper and cut them out. Cut three cake pieces from different cardstock colors and place back into the openings. Secure with tape on the back. I also added the candle in the same way.
 This die set also comes with a little border, which I cut out from glitter paper and added as decoration on the cake pieces.
Since it is a wacky cake, I thought the card design should be a bit wacky too. My cardbase is made from a piece of shimmer cardstock (silver) and I glued a piece of dark blue cardstock to it. I placed the blue cardstock slightly off as you can see in the picture and simply cut the overhanging pieces around the base off.
 The scalloped rectangle is placed with foam dots on the base, again a little wacky :-)
Well, do you remember the grey "Happy Birthday" pieces we cut out of the second card we made? They came to good use here. A few rhinestones and this card is almost done.
I stamped a saying inside the card and decorated with a few confetti's...
Voila, another fun card is done.
I hope you like our little excursion into the world of die-cutting. There are so many more things you can do with this technique.

I hope you will try it and let me know how it works for you. Come join one of my monthly workshops and learn more techniques like this one. Email me for schedules and more information.
Coming up....Easter cards!
No comments:
Post a Comment