For our second Easter card we used a white card base measuring 5 1/2" x 5 1/2" with the fold on top.
I used my Cricut cutting machine and a digital image of the church window to cut both layers. The window without the details was cut from the card base.
A piece of vellum cut at 2 3/4" x 4 3/4" is placed right on top of the cut out. You can adhere the vellum to the outside of the card with just a little bit of adhesive around the opening. The vellum will be covered later on.
Next I had my machine cut the window and the detailed window portion from a square piece of 5" "Tangerine" colored cardstock. I adhered the middle detailed part of the cutout on the vellum and decorated it with a small silver cross.
The square with the window is placed in a brick embossing folder. Make sure the paper is place in the folder the right way so the bricks are horizontal.
The backside of the square is covered with foam dots and adhered to the front of the card lining the window opening up with the detailed cutout on the vellum.
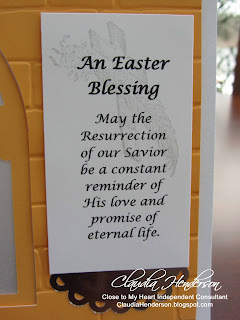
I found this phrase on the internet and used my computer to print it out. Cut to the size of 3 1/2" x 2" I used some light ink and a cross stamp to add a little background to the piece.
Again we used foam dots to ad it to the front and a small silver decor underneath.
The inside is decorated with the same light ink and stamp used on the front.
You can also add some doodling on the inside using a black pen.
You can also use this card with a small LED light. Stand the card up and place the LED light behind the vellum. Make sure to let your recipient know ;-)
If you like to know more about the cards shown, technique used or how to join the classes, please feel free to contact me.
Stay tuned for more to come....


No comments:
Post a Comment