Showing posts with label Cricut. Show all posts

September 4, 2019

New and exciting Close to My Heart Cricut News

Finally a few words about our new Cricut corporation. 
Yes, Cricut and Close to My Heart joining the forces. 


Cricut started to discontinue making physical cartridges this year and this would also involve our Close to My Heart cartridges. While we still have a few in stock, all others will now be available only online, meaning digital. (You will need a Cricut Explore or newer!)
All new cartridges that will be released in the future will also be only available as a digital version. As you might have seen already, neither the new "Core Idea Book" nor the "Seasonal Book Sep-Oct" contain any new cartridges. The reason being, Close to My Heart and Cricut started a new affiliation program which allows our Close to My Heart customers to order the new cartridges direct at Cricut including all other tools and products you might need. Yes, the new cartridges are only available through a special link from us consultants. 


 So how do you order these now?
All exclusive cartridges from Close To My Heart will only be available through a special link! The link will transfer you directly to the Cricut shop. If you already have logged in before at the Cricut shop, use your login info otherwise sign up and start shopping. Yes, you can shop everything else in the shop including the exclusive cartridges, but you will only be able to see the CTMH cartridges by using the special link! Sounds complicated but actually it isn't and here is why:

While you are at my Close To My Heart website browsing through all the new and exciting products :-), go to the main page, scroll down to the bottom and click on the little Green Cricut icon right next to the Facebook symbol. 
Log in and look for the CTMH cartridges. While you are there, add some matts or pens and anything else you might need too. ;-)

If this is still to complicated, click on the Cricut section here on the left side in the blog or click HERE.

I think the easiest way is here at the blog or anytime you are on my CTMH website and you see the little Green Cricut icon click on it. If you have questions, please let me know I am happy to help.

January 31, 2018

A card full of love

We start this card off with a regular card base of 4 1/4" x 5 1/2" folded on the long side.

The pretty light rose paper for the background is from Close to My Heart and is called "Bashful". 

I used the same bashful ink for the stamping of the background. It is really very light but oh so pretty. I used a lettering stamp to cover the background randomly.

The bashful cardstock is cut at 4" x 5 1/2" and is adhered to the card front. A little edged on the top and bottom from the card base is shown.

The word "love" and the swirl both were cut from grey slate cardstock and adhered directly to the cardstock.

The flower is made from three different sized flowers in three different shades of purple. To give the flower a little bit more shape, I used a flower shaping tool and a soft mat to form them. 

 The layers are adhered together, but each is offset from the previous one. A little pearl finishes off the flower.

The hearts are also cut in three different sizes. Two large, two middle and one small size.

I arranged them so it looks like they are flying off the flower. You can adhere them flat or with foam dots to the card. Spread the remaining pearls on the card.

For the inside, I printed out a phrase I found on the internet. Sometimes it is hard to find fitting phrases or I simply don't have the stamp for it. This way you can create wonderful phrases for the inside of your cards ;-)
Just don't forget to name your source of it.

I cut two strips of the bashful paper and adhered them to the top and bottom of my quote before I placed everything inside my card.

All materials used from this card can be found on my Close to My Heart website.

January 29, 2018

Hearts and Love for Valentines Day

Making a Valentines Day card or simply a card for the one you love. Maybe for a wedding or anniversary? So many occasions you can use these elements for.

Let's start with the card base. The base is a regular 4 1/4" x 5 1/2" folded on the left side.

I cut a piece of grey "slate" cardstock at 4" x 5 1/2" for the background.

Next I used two stamps and Close to My Hearts "Daisy White" pigment ink. This ink is awesome. It is super bright on dark papers and stays white without fading. 
I stamped the lines multiple times and added the dots as fillers to it.

The strip of grey design paper is cut at 4" x 1".
I cut both hearts, the swirly and the two sizes of leaves from Close to My Heart cardstock and design paper.  For the "love" I used a light lilac metallic paper.

You can leave all parts just as they are, but I found that edging them with a little bit of grey slate ink give them more interest. I usually use a small sponge for my edging. This gives me more control were the color goes and it leaves a finer edge. (I am not good with the direct ink pad to paper technique. It always looks so messy when I do it :-))

Now it is all about how to arrange all these things. Right? 
One method I have used before, pick them all up and drop them on your card. Seriously, if you need a random look (like with sequins or other items) this is a great way to start.

Here I started with the paper strip and the swirly. I wove the strip through the swirly and attached the pair with foam dots to the card.


Next I took my two sizes of leaves and pinched the pedals just a bit with my fingers. I added the small one on the top of the strip and the bigger one on the bottom. Having the strip on foam dots makes it easier to scoop them underneath in position.

Now the hearts and finally the "love" phrase. At the end I added my three sequins to the mix. 

Again, for the inside of the card I printed out a phrase I found online and who can beat Dr.Seuss, right? I thought its a nice phrase for this card. I placed a piece of eggplant cardstock underneath it. You can also off set both pieces to make it more interesting.

I also added a little doodling to it (after I took these pictures LOL something was missing)

Well, all materials used in this card, beside the sequins and the metallic papers can be found on my Close to My Heart website.

For more information about my classes, the products or any technique/ card shown here, please feel free to contact me.


January 24, 2018

Thinking of You Card

 This card starts with a regular card base 4 1/4" x 5 1/2", folded on the long side.

The fern cardstock is cut at 4"x 5 1/4" and centered in the middle of the base front.

First I stamped the "Thinking of You" phrase in black ink to the right side of the card.


Next I stamped the branch in fern ink twice on the front.

The swirl is cut out from New England ivy cardstock and adhered flat to the lover left side.

The heart is cut from mat metallic cardstock and added with foam dots to the top of the swirl.

For the roses, they were cut with the Cricut from Close to My Heart flower design paper. They come out in a spiral with a small end on the outside of the spiral and a bigger dot in the middle. Start curling up the flower from the smaller piece towards the middle. Nice and tide. Ones you get to the middle, let carefully go of your roll so the rose can unfold a little. Don't let it get away from you ;-)
Add some glue dots to the middle and press the roll of your rose into it.

Before I adhered to roses to the card, I added little sliver metallic pedals on the side. Decorate with pearls and make some doodling on the inside. Use one of the swirls from the outside for the inside part too.

The roses are a bit 3-d and you might find it hard to sent the card through the mail. If you like to sent the card via mail, maybe place the silver pedals in the places of your roses and add the pearls in the middle of them. You can use these 3-d roses for many other projects as well. They make nice decorations for all sorts of boxes.

Check out the used materials and stamps on my website.

October 2, 2017


CRICUT ALERT! CRICUT CARTRIDGES! CRICUT ALERT!

Dear Blog-Readers and Crafty-Friends,

Provocraft Cricut is discontinuing ALL of their physical cartridges!
Sooo .... if you were planing on getting any of our CTMH cartridges, then now is the time to do so. You know you WANT them NOW before they are sold out. Ones they are gone, you can only get them as digital version.
In case you are planing on buying more than 1 cartridge,... please..., contact me so we can arrange it that you can also get some free products on top and who doesn't like free right?

Please spread the word and let your friends know about the changes coming. Again, all (not only our CTMH) physical cartridges from Cricut will retire and are only available while supplies last. All future cartridges will be digital!

Click HERE to find our Close to My Heart cartridges.

March 17, 2017

Poppy Flower Step Card


Here card number three from February's card making class. Close to my Heart released this wonderful new Cricut cartridge called "Flower Market" and I have to say, this is my top favorite one.

The poppy flowers are only one of many pretty flowers that you can cut with this new cartridge. I flower is cut from 4 different colored cardstocks. The green is the base, followed by a brown (center of the flower), a red (main flower) and a dark red (3-d part of the flower).

I also cut the background piece of the flowers with the Cricut, the leaves seen on the left and the Happy Birthday ovals.

I created the cardbase with the stepper portion on the left side. I covered all steps and the front main part with red cardstock. Next I used a sponge to ad a little texture to the background piece. The poppies were layered together and then adhered to the background. I place the piece with some foam dots to the right side of the card. 

The phrase ovals are layered together and adhered to the back step on the left. I place the two leaves on the middle and front step, added a little bow and a few pearls and this card is done.

If you like to join me in one of my classes, contact me for more information. Stay tuned for more to come ....


January 30, 2017

With Sympathy Card

Here is another one of our cards we made during this months card class. This time the card base is cut from a piece of grey cardstock at 4 1/4" x 11" and scored at 5 1/2".

We adhered a piece of black cardstock 4" x 5 1/2" in the center of the front, leaving just a small piece of the grey on the left and right side. The lily flowers are cut with the new Close to My Heart exclusive "Flower Market" cartridge. These flowers are a four part construction. The first layer is the green stem and the flower itself. The next layers are cut from yellow, cream and white cardstock and layered right on top of each other. Love love the 3-D effect you create with these layering techniques. 

Now all that is left is to arrange the flowers on the front of the card. We stamped out phrase on a piece of cream cardstock. The green and cream flags are cut at the same size and off set from each other with foam dots. Last we arranged the leaves and the little pearls.

Stay tuned for more to come .... 


January 25, 2017

Flower Card - For a Speedy Recovery

As I mentioned before, the new Close to My Heart Cricut Cartridge "Flower Market" is by far my favorite of the cartridges we have in the program. It contains so many wonderful flower options...let's see what I have picked for this class project:

Starting with a regular 4 1/4" x 5 1/2" card base and a piece of thistle cardstock cut about 1/4" smaller and a piece of white cardstock completing the card base.

Now on to the embellishments.... both flowers and the paper bag with the bow are all cut from the new "Flower Market" Cricut cartridge.  Both flowers are cut in multiple layers. The cartridge contains all the layers and will cut them automatically in the size you choose. All you are left to do is pick your paper colors.

The purple flower is cut from green cardstock for the base, then a super light pink which only peaks through a little (hard to see here, but see the picture at the end), followed by a dark purple layer and the medium purple to finish it off. Leaves are cut separate so you can position them anywhere on the flower you like. To archive the 3-D look of the flower, simple adhere the layer in order as you can see them on you cutting file. I adhered them with some liquid glue and no foam dots (this wouldn't work well here). Each layer lines up with the previous one to make the assembling really simple. The same goes with the pink flower on the right.


The bag comes cut in two pieces, the dark background and a lighter brown front. I adhered the front part only along the edges and left the top part open. This allowed me to stick my assembled flowers inside the bag. Once they were positioned in the way I wanted them, I flipped the bag with flowers over and put adhesive on the whole piece. Turn it over and place it on your project. You don't need to apply adhesive on every little piece, just the bag and the main flowers will do. All that was left now was to add my leaves and the little bow and decorate with some rhinestones...and in the inside.
Would you like to learn how to make these and other flowers? Would you love to make some cards ever month with a fun group of ladies? Or would you like to join a small class with more individual topic planing? In any event, please feel free to contact me for more details....comment below if you like this card or the flowers etc....and stay tuned for more!


January 23, 2017

Sympathy Card - Our thoughts are with you

A new year brings on a new round of card making classes. Here is one of the cards we made for January and the first one my ladies had to use the embossing machine themselves LOL.

I used to crank these papers through, but my arms are getting tired the more our group is growing and I thought they might like the new experience...and they did.

We started with a card base of 4 1/4" x 5 1/2" in whisper (light gray) Close to My Heart cardstock. We added a piece of white cardstock that we run through an embossing machine. 

I cut the leave branches from whisper (light gray), slate (dark gray) and crystal blue cardstock and used the brand new Close to My Heart exclusive Cricut Cartridge "Flower Market".
I love love this new cartridge because it has so many great items on it. I also cut out an oval for the phrase we stamped on and a smaller frame oval that was placed on top of the stamped one. Inside we added another phrase and added a couple of grey rhinestones to finish up this card.


Stay tuned for more cards to come and make sure to follow my "Friday Technique" posts. If you like to know more about these or other projects from the blog, please feel free to contact me. If you like to join my monthly classes, please contact me as well for more information....

December 22, 2016

Christmas Card - Oh Deer

"Oh Deer" is one of the seasonal paper packages of this years Close to My Heart Seasonal Holiday book..... the name is so funny and the paper is so cute. So here is a card I made with this special paper:

 For this card I pulled my Cricut machine out and tested the new Close to My Heart exclusive cartridge "Flower Market" plus one of the others.

I had the machine cut out the shape of the ornament (desert sand cardstock) and the pine branches (new england ivy).

The snowflake was cut with the new thincut dies (glacier).

I used a piece of "Oh Deer" design paper for the top of the card and a piece of glacier cardstock for the bottom. A piece of golden glitter paper brings both parts together.


I used a clear shimmer pen to add some sparkle to the snowflake and a glitter gel pen to add the detail to the top of the ornament.

The ornament is attached with some foam dots to the card. I decorated the pine branches and snowflake as seen in the picture and added a little bow from white-gold twine to the top. 


 Last but not least, a nice stamp was placed to the inside and this little gem is done.
Love to find out more about these and other techniques and products? Would you like to join on of my monthly classes and create cards and more on your own? Please contact me for more information and schedules. I would love to hear from you. 
You can also leave me a comment below.

Stay tuned for more to come.....

June 25, 2016

Close to My Heart Retiring Products...Say Goodbye

The brand new Close to My Heart annual Idea Book will be available on August 1st and this means, many old friends from the current Idea Book will retire by July 31st.

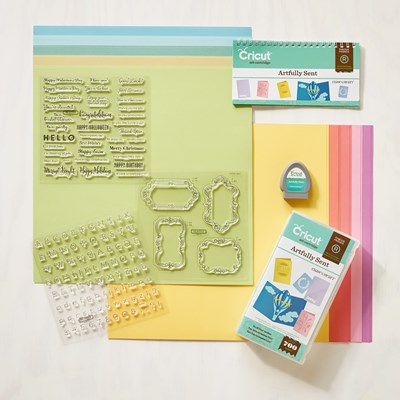
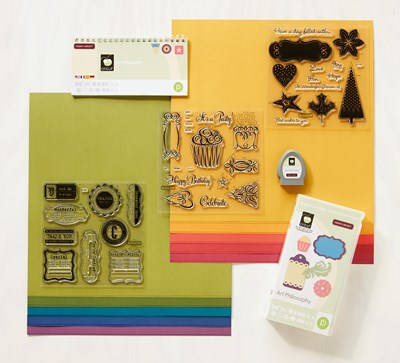
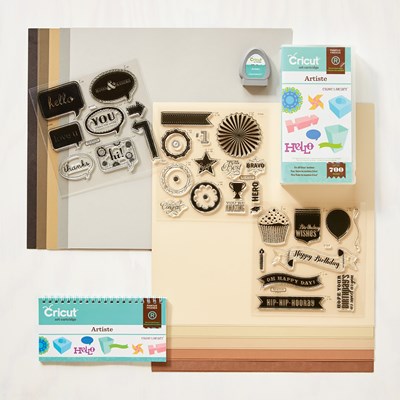
Included in this years retiring list are some of your favorite Cricut cartridges which are exclusive to Close to My Heart. Take your chance and order them until they are gone. Here are the 3 cartridges that will be gone by August 1st:

Artfully Sent (Z3168)


Art Philosophies (Z3171)


Artiste (Z3170)


If you click on the product number you will see the cartridge and all matching stamp sets for it on one page.

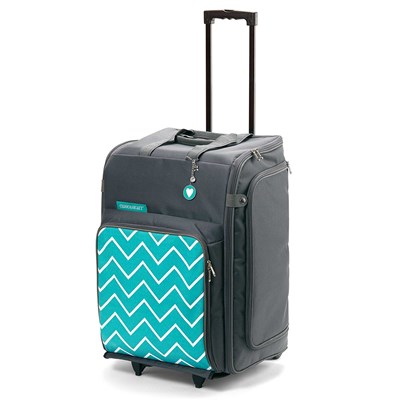
Further we also have to say goodbye to our awesome Rolling Tote (Z3032)... Don't
miss out and get it while you can.

If you like to see the whole product retiring list, email me!

June 17, 2016

We say Goodbye to some favorite Close to My Heart Products

The brand new Close to My Heart annual Idea Book will be available on August 1st and this means, many old friends from the current Idea Book will retire by July 31st.

Included in this years retiring list are some of your favorite Cricut cartridges which are exclusive to Close to My Heart. Take your chance and order them until they are gone. Here are the 3 cartridges that will be gone by August 1st:

Artfully Sent (Z3168)


Art Philosophies (Z3171)


Artiste (Z3170)


If you click on the product number you will see the cartridge and all matching stamp sets for it on one page.

Further we also have to say goodbye to our awesome Rolling Tote (Z3032)... Don't
miss out and get it while you can.

If you like to see the whole product retiring list, email me!

June 11, 2016

Say Goodbye to some favorite Close to My Heart Products

The brand new Close to My Heart annual Idea Book will be available on August 1st and this means, many old friends from the current Idea Book will retire by July 31st.

Included in this years retiring list are some of your favorite Cricut cartridges which are exclusive to Close to My Heart. Take your chance and order them until they are gone. Here are the 3 cartridges that will be gone by August 1st:

Artfully Sent (Z3168)


Art Philosophies (Z3171)


Artiste (Z3170)


If you click on the product number you will see the cartridge and all matching stamp sets for it on one page.

Further we also have to say goodbye to our awesome Rolling Tote (Z3032)... Don't
miss out and get it while you can.

If you like to see the whole product retiring list, email me!

May 25, 2016

Butterfly and Rose Overlay

I am a little behind with our monthly class project presentation, but since we will be on summer break soon, I am sure I will catch up.

Here is one of the cards we made in April and with the help of my awesome Cricut Explore... You didn't think we cut the butterflies and the roses by hand?

This card started with a piece of white cardstock cut a bit smaller than our base. We used the new Close to My Heart "Peacock" ink and a background stamp that looks like a watercolor image.

Next came the hard part...programming my Cricut LOL


First I picked the rose overlay from our Close to My Heart exclusive cartridges and one of the many butterflies that come with the cartridges. I made sure we had a butterfly that had a solid background and a lacy overlay. The butterfly was cut from two different shades of buttercream/ peach!

I placed the green rose overlay with foam dots to the stamped background. This gives it just a little bit more dimension. 
I then adhered the butterfly on top of the overlay. The laced butterfly was placed with two glue dots, located at the body of the butterfly on top of the solid one.

You can adhere the stamped background flat to your card base or you can use foam dots for more dimension. Perk up the wings of your butterfly and place a little banner with a phrase in the lower left corner....

Simple but pretty and a layout for many occasions.

Stay tuned for more....and if you wish to order a card or if you are interested to check out one of my classes, please let me know. You can contact me via Email just click HERE...
or leave a comment below!